27 Bunny Nail Designs That Are Cute, Soft and Easy to Copy
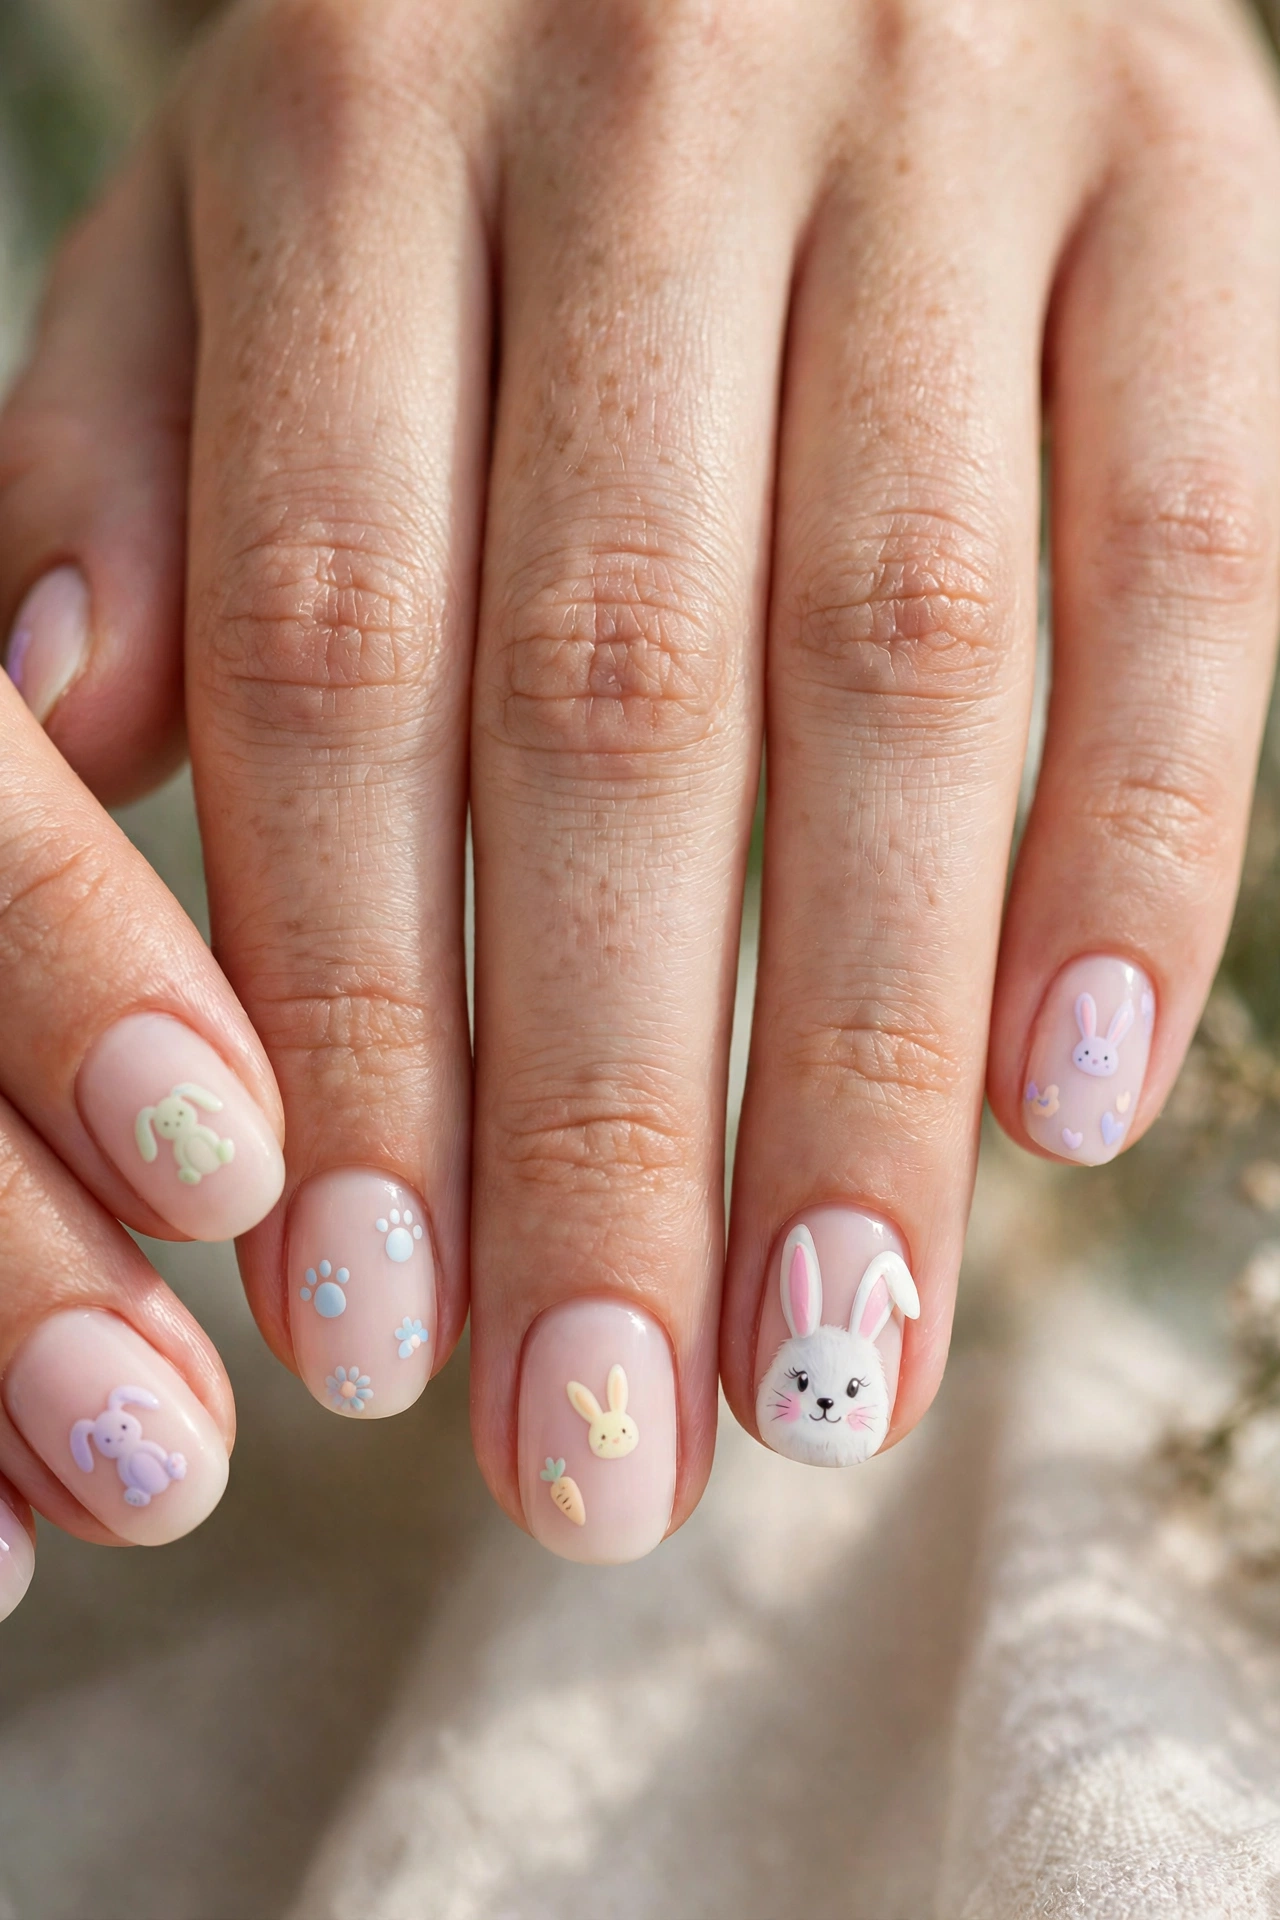
If you searched for bunny nail designs, you are in the right place. This guide is full of cute, wearable ideas, from a tiny bunny face on one accent nail to full pastel sets with ears, whiskers, and little tails. Some looks are soft enough for work or school. Others are playful and perfect for Easter, spring photos, or a birthday set. Every idea below explains the colors, the nail shape that suits it best, and how to ask for it at the salon or copy it at home, so you do not have to guess.
Bunny nails work because they can be as simple or as detailed as you like. A small white bunny on a nude base reads sweet and clean. A full set of 3D bunny nails with bows and pearls reads fun and bold. You can wear them on short nails, almond nails, or coffin nails, and you can switch the base color to match any season. Soft pink and lavender feel right for spring. Cream and light blue feel fresh for summer. If you already love planning your sets by season, our guide to september nail inspo shows how the same soft shades can shift into early fall when you want a change.
One honest tip before you pick a design: the cutest bunny looks are the ones with space to breathe. A bunny face needs a little room for the ears and eyes to show clearly. On very short nails, keep the art small and use just one or two accent nails. On longer nails, you can go bigger. Think about your daily life too. If you type all day, clean a lot, or work with your hands, a flat painted bunny will last better than tall 3D art. Cute should also be practical, and this list helps you find both.
Soft and Simple Bunny Nail Designs for Every Day

Not every set needs to shout. The soft and simple bunny nail designs in this section are made for everyday life. They use nude, milky white, blush pink, and other calm bases, with bunny art kept small and neat. These are the sets you can wear to the office, to class, or to a family lunch without feeling overdone. They are also the easiest to do at home, because most of them need only a dotting tool, a thin brush, and two or three polish colors. If you love a clean, polished look in general, you will find the same calm feel in our favorite classy short nail designs, which pair beautifully with the short bunny ideas below.
1. Minimal Bunny Face on a Nude Base
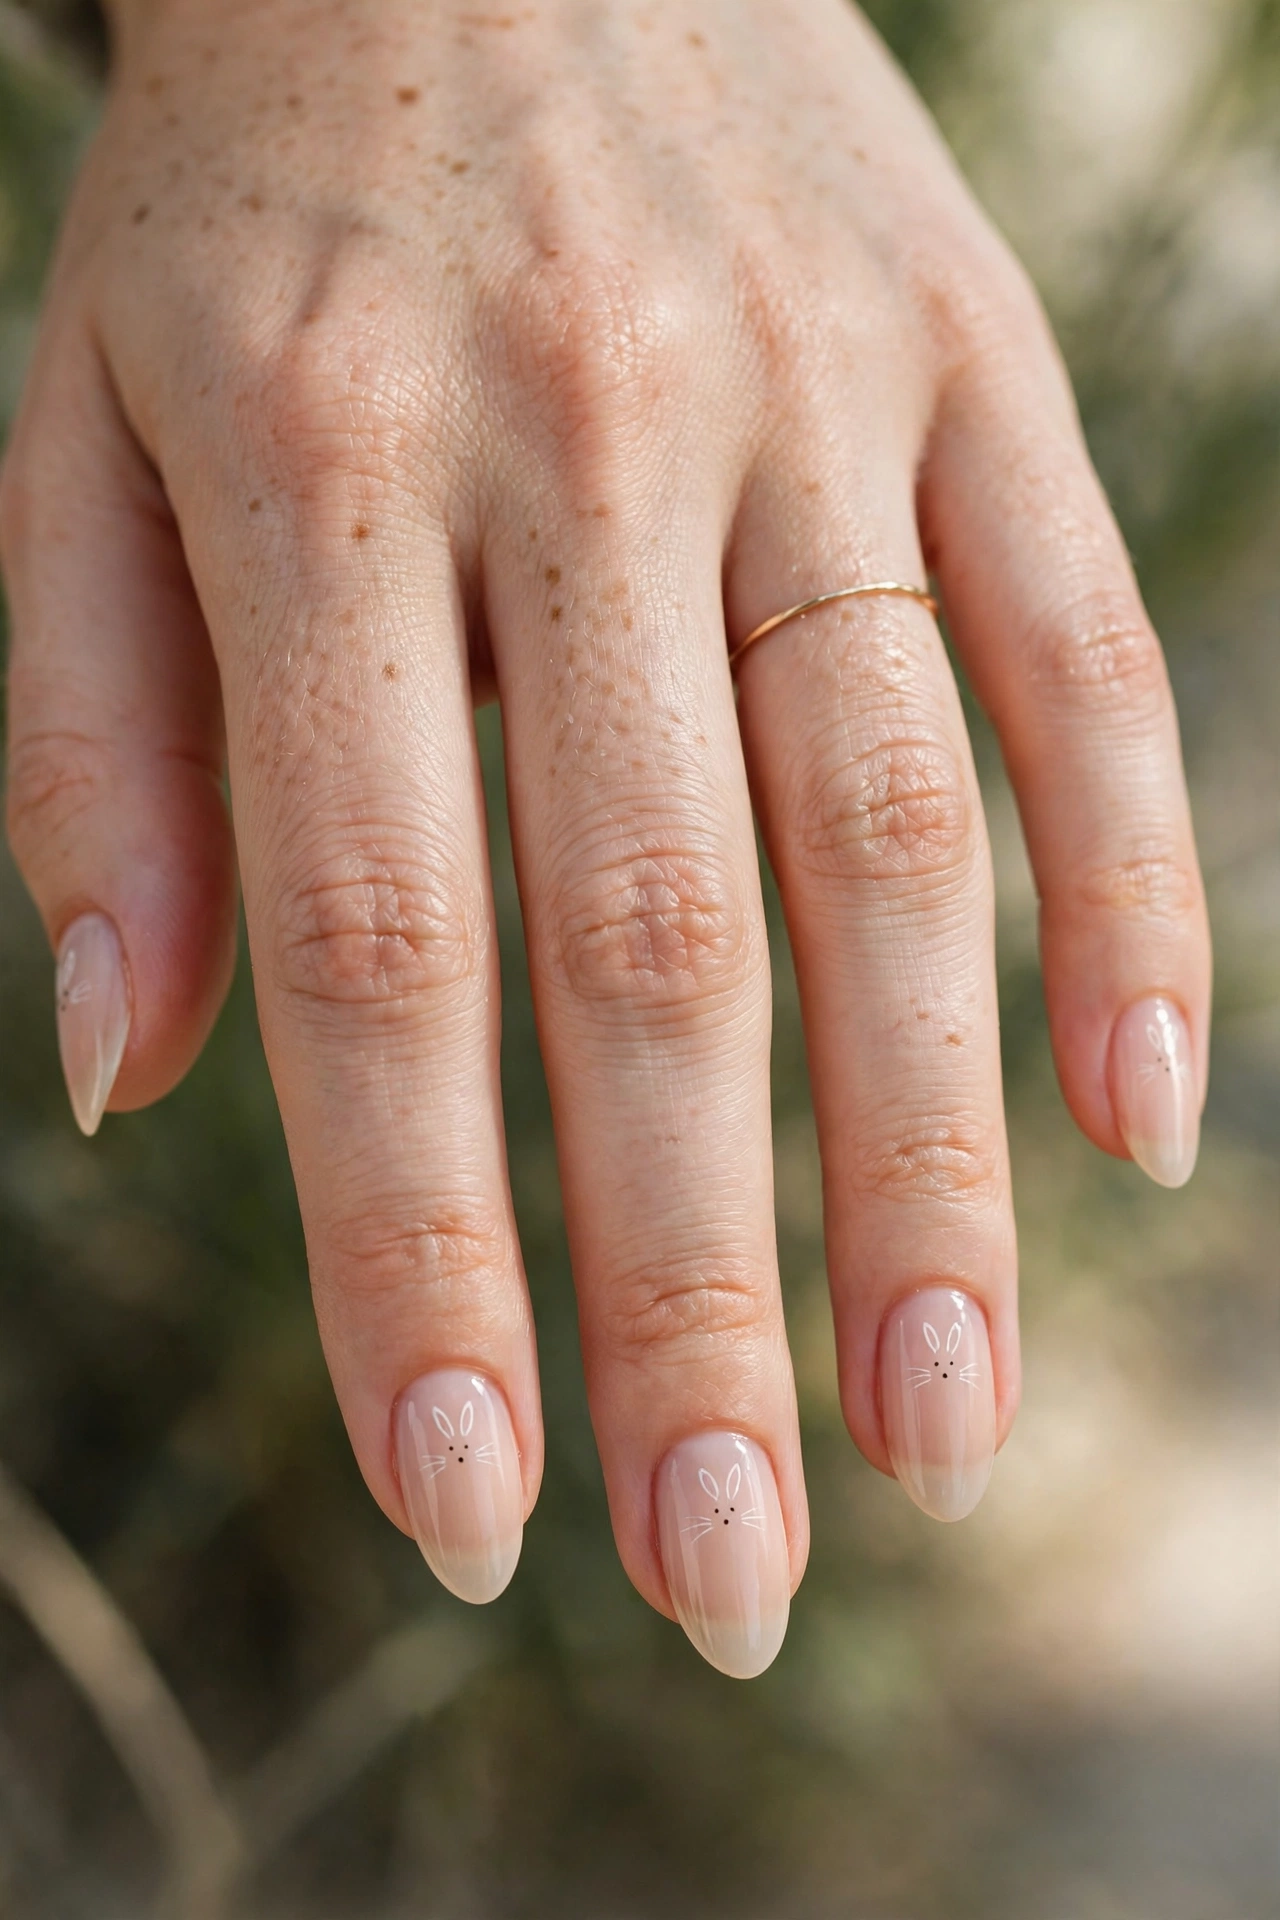
This is the best starter design if you are new to bunny nail art. Paint all your nails in a soft nude or milky pink that suits your skin tone. On one or two accent nails, add a small white bunny face near the tip or in the center of the nail. Two long ears, two dot eyes, a tiny pink nose, and thin whisker lines are all you need. The face should look a little sweet and a little imperfect. That hand-drawn feel is part of the charm.
Almond and oval nails give the ears the most graceful shape, but this design works on short square nails too if you keep the face small. At the salon, show a photo and ask for hand-painted art on the accent nails only, which usually keeps the cost lower than a full art set. At home, let the base dry fully before you draw the bunny, or the colors will drag. Finish with a glossy top coat so the tiny lines look crisp. Common mistake to avoid: making the ears too thick. Thin ears look cute. Thick, dark ears can look more like a cat or a mouse, so keep the brush strokes light.
2. Bunny French Tips in Soft White and Pink

Bunny French tips take a classic French manicure and give it a playful twist. Instead of a plain white tip, the tip is shaped or painted to suggest bunny ears, or a tiny bunny face sits right on the smile line of one nail. The base stays sheer pink or nude, so the set still feels clean and grown-up from a distance. Up close, the bunny detail makes people smile. It is a lovely choice for spring weddings, baby showers, and Easter brunch when you want cute without going full cartoon.
This design suits medium and long almond nails best, because you need a bit of length for the tip work to show. Short nails can still wear it, but ask for a thinner tip and a smaller bunny so nothing looks crowded. If you do it at home, French tip guides or a steady cleanup brush will help you keep the line neat. Add a tiny pink dot nose and two black dot eyes to just the ring finger bunny for a balanced look. Avoid adding a full bunny face to every single nail here. The charm of this set is that it stays mostly classic, with the bunny as a sweet surprise.
3. Short Bunny Nails With Pastel Dots and Tails

Short bunny nails deserve just as much love as long sets, and this idea proves it. Paint each nail a different soft pastel: baby pink, lavender, mint, butter yellow, and sky blue. Then add one small bunny detail per hand. It could be a tiny white bunny silhouette on the ring finger, or a fluffy white tail made with a soft dot of white polish and a few light strokes for fur texture. A few extra white dots around the bunny look like little paw prints or spring confetti.
This is one of the easiest looks to copy at home because dots forgive shaky hands. A toothpick or the end of a bobby pin makes perfect small dots if you do not own a dotting tool. The short length is practical for moms, nurses, students, and anyone who uses their hands a lot, and the pastel mix keeps it fun. If pastels feel too light for your style, try the same layout in soft cream and sage for a calmer version. Just keep the bunny art on one nail per hand. On short nails, too much art in too little space gets muddy fast, and one clear bunny always reads cuter than five crowded ones.
Cute Bunny Nail Ideas for Easter and Spring

Spring is bunny season, and Easter bunny nails are where this trend truly shines. Think garden colors, tiny flowers, carrots, eggs, and soft gingham or polka dot patterns mixed in with your bunnies. These sets are more colorful than the everyday ideas above, but they are still wearable if you keep one base family, like all pastels, across the whole set. This section is also great if you are planning nails for photos, because bunny art with spring details shows up beautifully in close-up shots of baskets, bouquets, and egg hunts.
4. Easter Bunny Nails With Carrots and Tiny Flowers

This full spring set tells a little story on your hands. One nail holds a white bunny face with long ears and a pink nose. Another holds a tiny orange carrot with green tops. The rest of the nails mix soft floral dots, pale green leaves, and pastel bases in pink, yellow, and lavender. The key is to repeat the same few colors on every nail so the set looks planned, not random. A glossy finish makes the colors look fresh, like a spring garden after rain.
Medium almond or oval nails give you the canvas this design needs. If your nails are short, simplify: bunny on one nail, carrot on one nail, plain pastels on the rest. At the salon, book this as a detailed art set and bring a clear photo, because the tiny flowers and carrot take time and skill. At home, nail stickers or stamping plates for flowers can save you a lot of frustration, and there is no shame in that. Mixing one hand-painted bunny with sticker flowers is a smart, budget-friendly way to get the same overall look without spending an hour on ten tiny paintings.
5. Pastel Bunny Nails With Gingham and Polka Dots
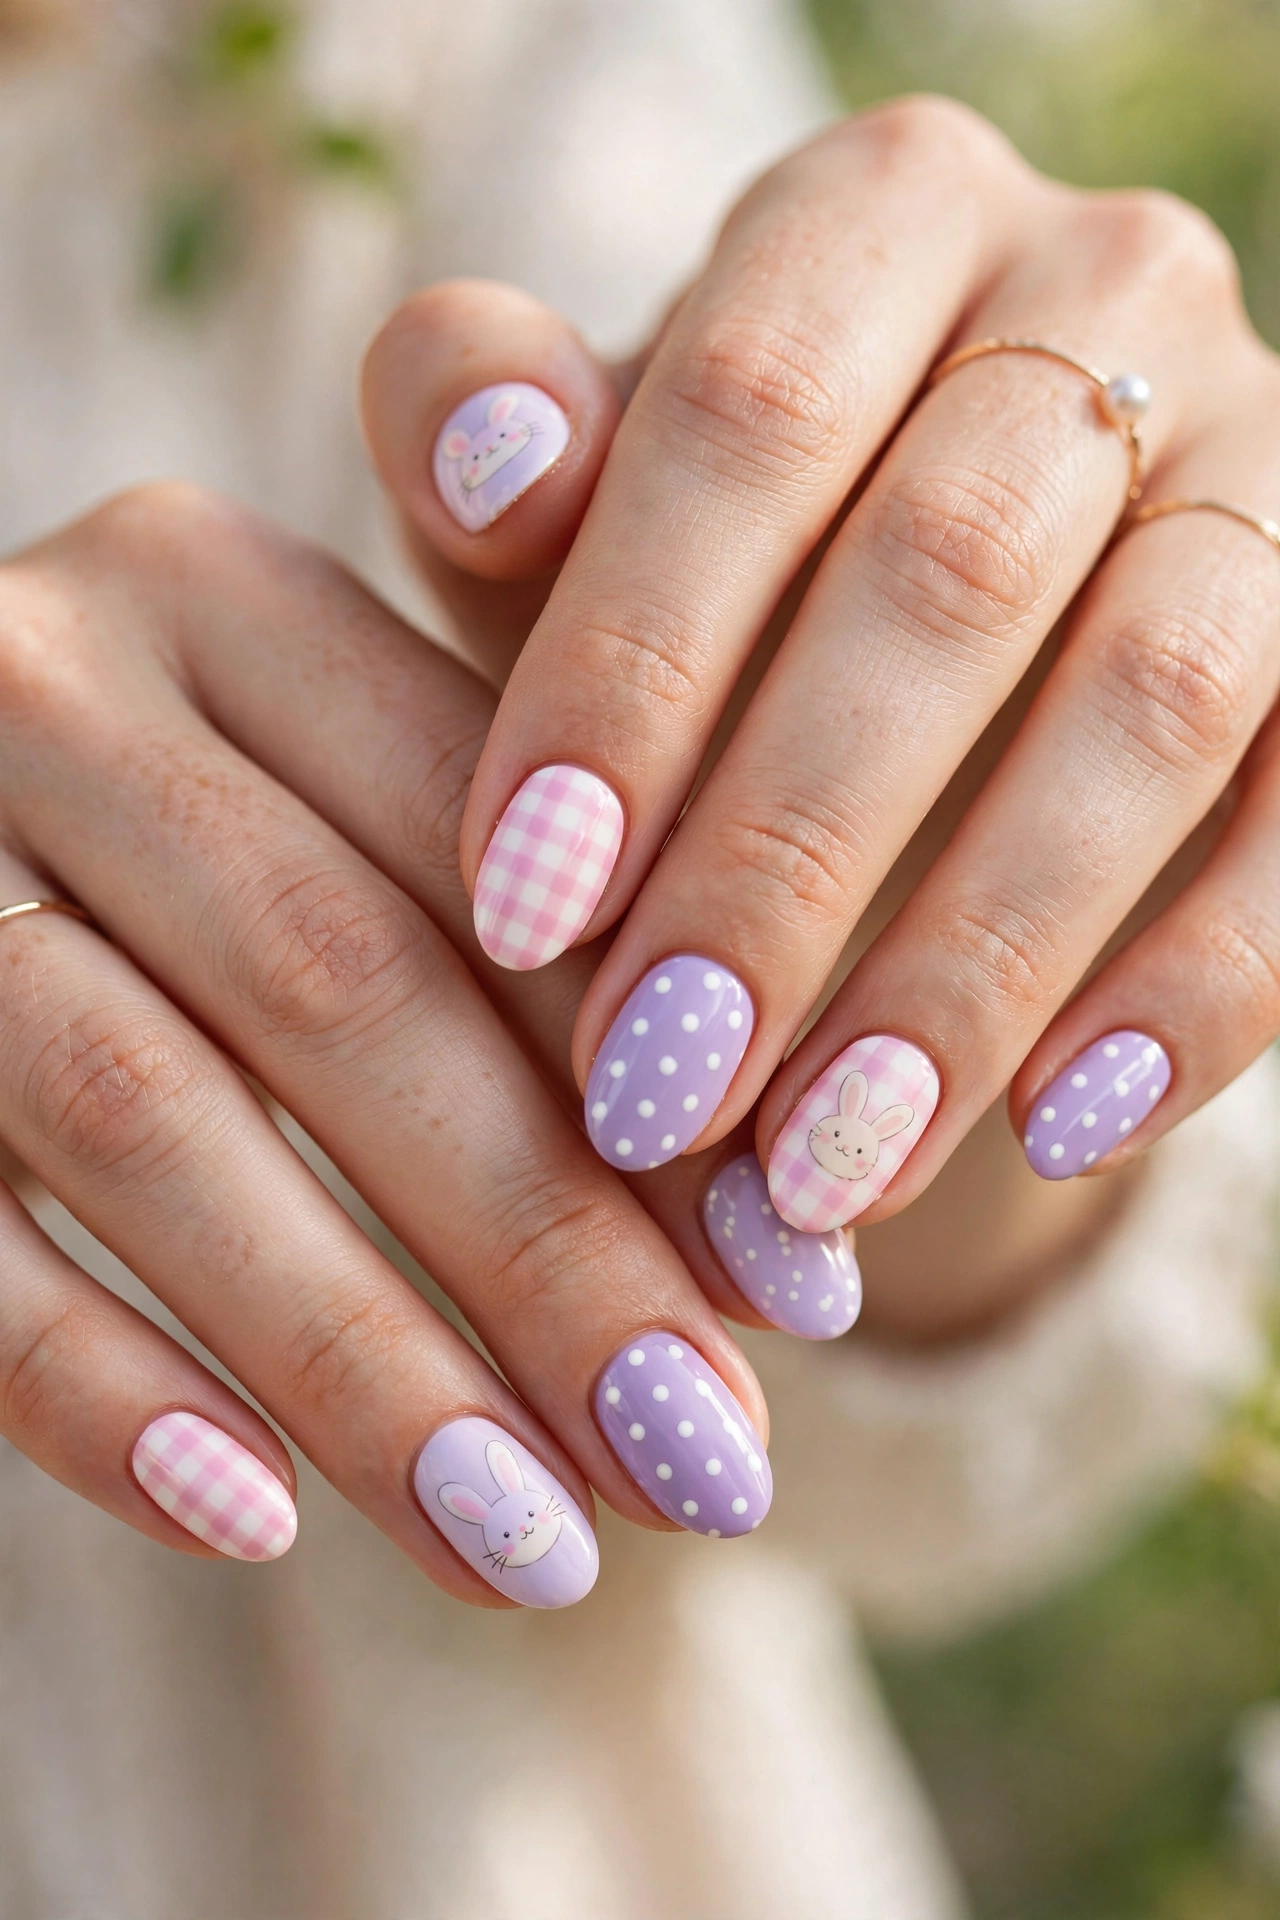
If you love a sweet, picnic-like style, this set is for you. Pastel bunny nails meet soft gingham checks and polka dots for a look that feels like a spring dress in nail form. Keep the bunny simple here: a white bunny head with pink inner ears on one or two nails. Let the patterns do the rest of the work. Light pink gingham on one nail, white dots on a lavender base on another, and plain pastel on the rest keeps the set busy in a good way, never chaotic.
This design is a great pick for Easter photos, spring birthdays, and anyone who loves a soft, feminine style. It works on square and squoval nails especially well because the straight edges suit the gingham grid. A warning from experience: gingham is harder than it looks. The lines need to be even, or the check looks messy. If you are doing this at home, use striping tape or a gingham sticker as your base pattern and hand-paint only the bunny. If a nail tech is doing it, agree on just one or two gingham nails, not all ten. Your wallet and your nail tech will both thank you, and the set will look cleaner for it.
6. Baby Blue Bunny Nails With Clouds and Stars

Sky blue is one of the prettiest bases for bunny nail designs, and this dreamy set shows why. Paint your nails a soft baby blue, then add fluffy white clouds, tiny gold or white stars, and a sleepy bunny face with closed eyes on the accent nail. The mood is calm and a little magical, like a bunny napping in the sky. A soft matte top coat makes it look like a storybook page, while a glossy top coat makes it look bright and fresh. Both work, so pick the finish that matches your style.
This set suits almond and coffin nails, where the sky has room to spread, but a short version with just clouds and one small bunny is lovely too. Blue lovers will also enjoy browsing blue nail ideas for other ways to wear this color family beyond bunny season. When you copy this look, keep the bunny eyes closed with two small curved lines. Sleepy bunnies are easier to paint than open eyes, because you skip the tricky dot placement, and they look extra sweet. Add one tiny pink blush dot on each cheek of the bunny and the whole face comes to life with almost no extra effort.
Playful Bunny Nail Art With Color, Bows and 3D Detail

Ready to go bolder? This section is for bunny lovers who want their nails to be the outfit. Bright bases, bows, pearls, glitter, and raised 3D bunny art all live here. These sets are perfect for parties, themed photos, and anyone who loves kawaii bunny nails with a cute, doll-like feel. They do need a bit more care in daily life, since raised art can catch on hair and fabric, but for a special week or a fun event, they are hard to beat. Balance is the secret: let two or three nails carry the drama and keep the rest simpler.
7. 3D Bunny Nails With Bows and Pearl Details

3D bunny nails use gel or acrylic to build a small raised bunny right on the nail. You might get a tiny bunny head with long ears, a small bow between the ears, and a few pearls or gems around it. The base is usually soft pink, milky white, or clear with a hint of glitter, so the 3D art stands out. This is the most eye-catching style in this whole guide, and it photographs like a dream for close-up hand shots, ring photos, and product photos where your hands are in frame.
Be honest with yourself about upkeep before you book this set. Raised art can snag on sweaters, feel heavy if it is built too thick, and needs a careful removal so you do not damage your natural nail. This is a salon design, not a beginner home project, and it costs more than flat art. Plan to wear it for an event or a short trip, not for a month of heavy housework. Ask your tech to keep the bunny low and smooth at the edges, which helps a lot with snagging. And never peel 3D art off yourself. Soak-off removal protects your nails, and healthy nails are what make the next cute set possible.
8. Kawaii Bunny Nails in Pink With Hearts and Blush Cheeks
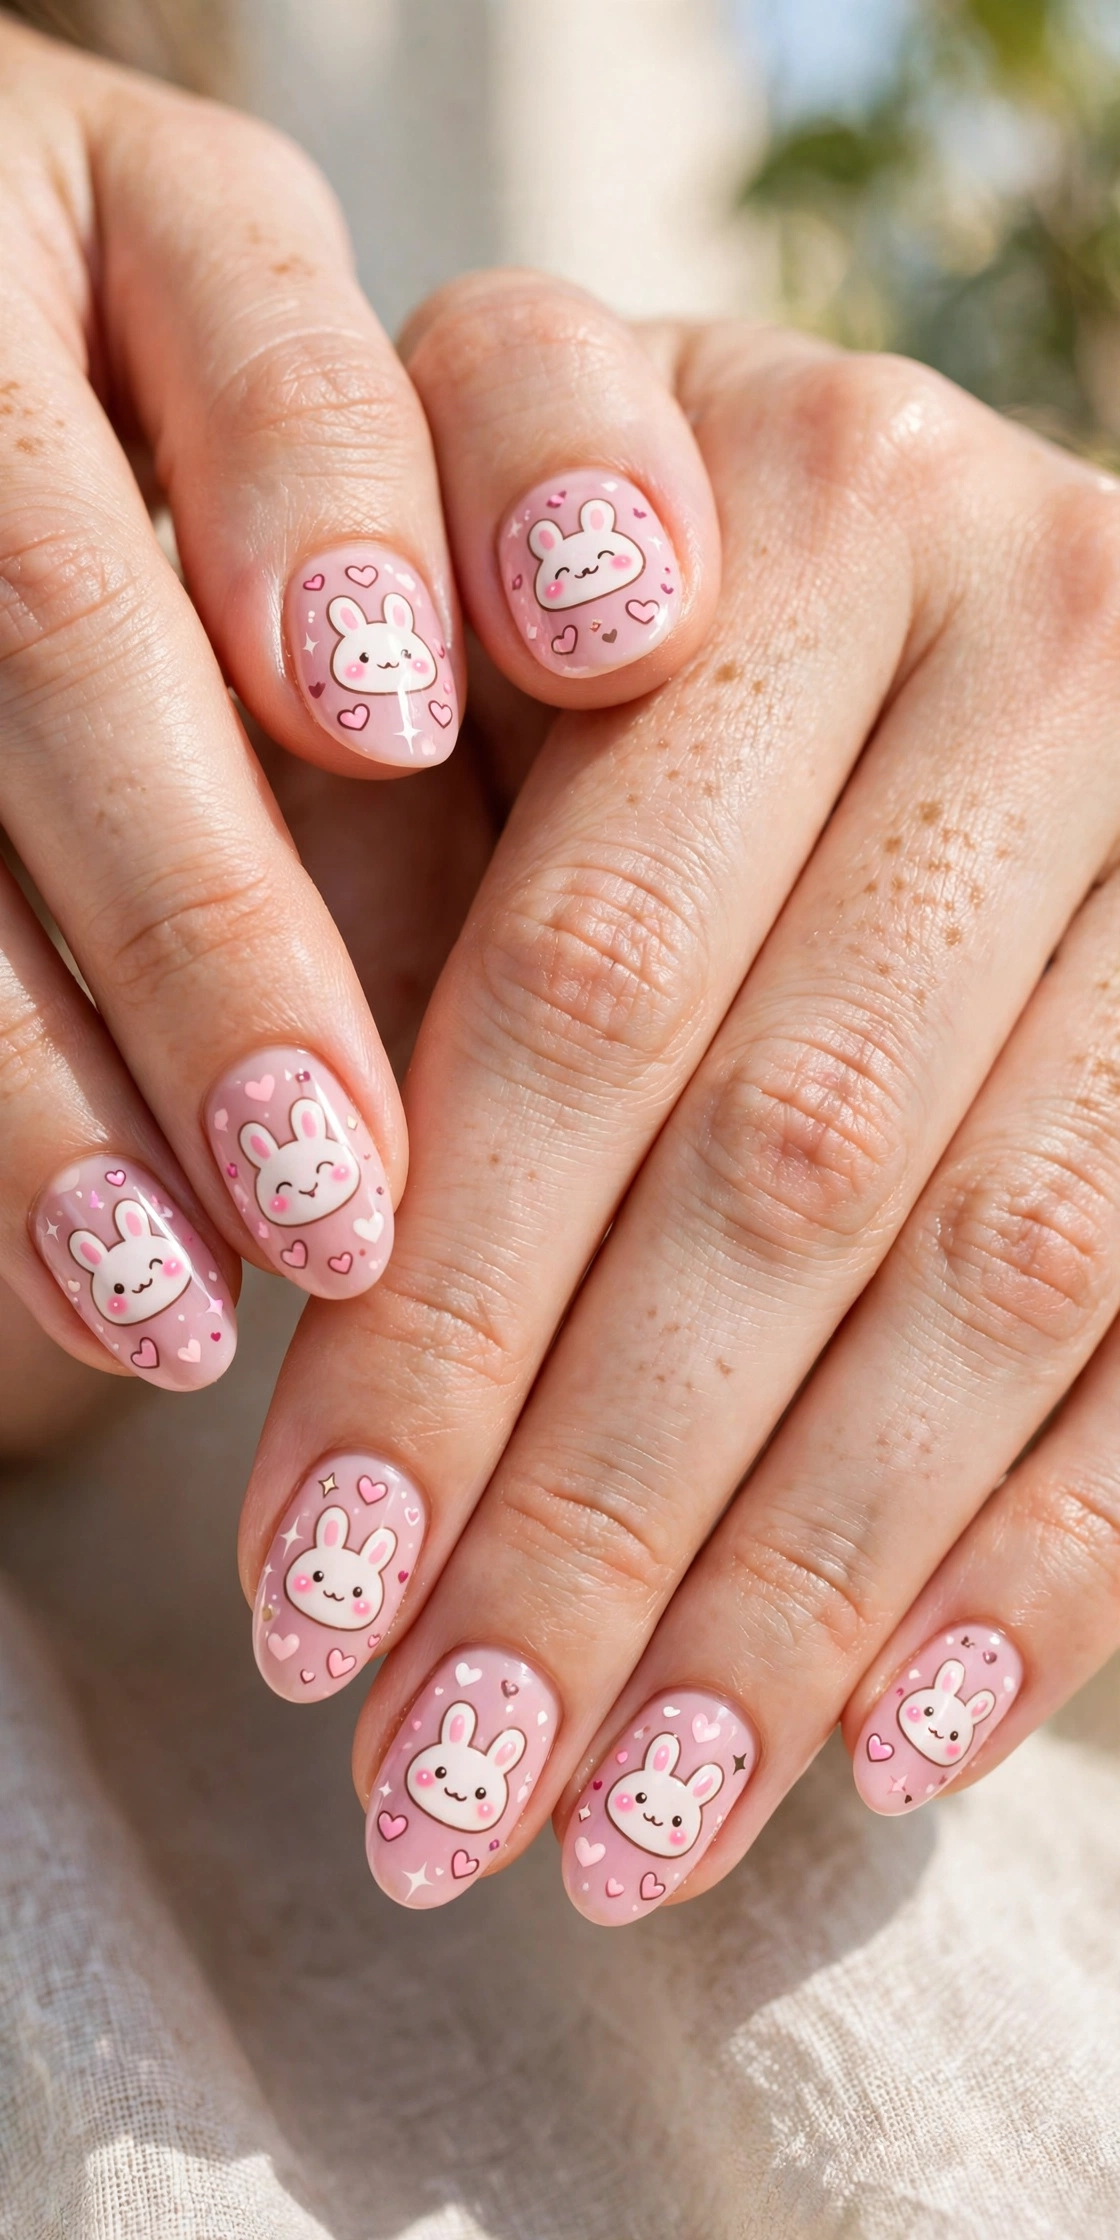
Kawaii bunny nails lean into everything cute: round bunny faces, big shiny eyes, pink blush cheeks, tiny hearts, and soft pink bases with white French edges or polka dots. Each nail can hold a slightly different expression, like one winking bunny and one surprised bunny, which makes the set feel alive. This style is loved for birthdays, anime or Sanrio-inspired looks, and sweet Valentine-adjacent sets. In fact, if you love pink and hearts beyond bunny season, our roundup of valentines day nail ideas uses the same soft color story in a more romantic way.
To copy this at home, work in thin layers and let each layer dry. Draw the white bunny face first, add pink inner ears and cheeks, then finish with black eyes and a tiny mouth. A fine liner brush matters more here than expensive polish. Keep a small cup of remover and a flat brush nearby to clean up edges as you go. One tip that saves this design: make the eyes a little bigger than you think. Small eyes can disappear under top coat shine, while slightly bigger eyes keep that wide, cute kawaii look. If the faces feel too bold for every nail, do kawaii bunnies on two nails and simple pink with white hearts on the rest.
9. Glitter Bunny Nails for Parties and Photos

Glitter and bunnies are a happy match. A soft pink or nude base with fine silver or iridescent glitter gives you sparkle, and a clean white bunny on top keeps the set cute instead of chaotic. You can do a glitter gradient that fades from the tip, a full glitter accent nail next to the bunny nail, or a light glitter wash over the whole set. This is a strong choice for parties, concerts, New Year events with a soft theme, and any night when flash photos will be taken, because glitter catches light beautifully.
The trick is contrast. If the glitter is chunky and dark, a white bunny can get lost. Choose fine glitter in a light shade, or place the bunny on a smooth, glitter-free nail and let the nails beside it sparkle. Removal is the other thing to plan for. Glitter polish is famously stubborn, so use a peel-off base coat under it if you are doing this at home, or let the salon handle removal. Your future self will be grateful. For daily wear, tone it down by using glitter on just the tips. You still get the party shine when your hands move, but the set feels light enough for daytime too.
How to Get Bunny Nails You Love, at Home or at the Salon

You have the ideas. Now here is how to actually get a set you love and keep it looking good. Start by choosing your nail shape honestly. Almond and oval shapes flatter bunny ears the most. Square and squoval shapes suit French and gingham bunny sets. Short nails are not a limit, they just need smaller art and fewer accent nails. Next, pick your base color family and stick to it: all pastels, all nudes, or one bold color with white art. Sets fall apart visually when every nail tries a different idea in a different color family.
For healthy nail tips that keep any set looking its best, the American Academy of Dermatology has a helpful guide.
At the salon, bring two or three photos, not ten, and point to the exact bunny size you want. Say clearly whether you want flat painted art or 3D art, because the price and the appointment time are very different. Ask how long the art will take and whether it costs per nail. A good tech will tell you plainly. At home, your best tools are a dotting tool, a thin liner brush, and patience. Paint the base one day and the art the next if you get tired. Nail stickers, stamps, and decals are not cheating. They are how many of the cutest sets online are actually made, and they are perfect for carrots, flowers, hearts, and stars while you hand-paint just the bunny.
Care matters as much as the design. Bunny faces are drawn with thin lines, and thin lines chip first at the tips. Add a fresh layer of top coat every two or three days to seal the art back in. Wear gloves for dishes and cleaning, because hot water and harsh cleaners fade pastel bases fast. Keep cuticle oil on your nightstand and use it daily. It keeps the skin around detailed art looking neat in photos and helps prevent the lifting that ruins a set early. If a bunny ear chips, do not repaint the whole nail in a panic. A tiny touch-up with a toothpick of white polish, sealed with top coat, usually saves it.
Avoid these common mistakes and your bunny nail designs will look twice as good. Do not crowd a short nail with a big bunny plus flowers plus glitter. Pick one star per nail. Do not use a base that is too close in color to your bunny, or the bunny will vanish; white bunnies need a base with some contrast, like pink, blue, or lavender. Do not skip base coat under bright or glitter polish, or you risk staining your natural nails yellow. And do not rush the drying between layers. Most smeared bunny faces happen because the base was still soft when the art went on.
If you loved these ideas, save this guide on Pinterest so you can pull it up at the salon or on your next at-home nail night, and send it to a friend who loves cute sets as much as you do. Then explore more ideas on FashionMarid, where you will find more nail guides that are pretty, practical, and easy to copy. Pick one bunny, start simple, and have fun with it. Your next favorite set is only a few dots and two little ears away.