
Curtain Bangs for Oval Faces: 18 Styles by Length, Texture and Hair Type

Some face shapes need a fringe that does a job: softening a strong jaw, shortening a long forehead, balancing wide cheeks. An oval face asks for none of that. It is already balanced, with gentle curves and proportions that suit almost any cut — which is exactly why curtain bangs for oval faces are less about fixing and more about framing. The fringe becomes a highlighter: it points at your eyes, traces your cheekbones and adds movement around a face that can carry any length you choose.
That freedom is also the trap. With no obvious “wrong” answer, it is easy to copy a photo of curtain bangs on a completely different texture and wonder why yours sits flat, springs up or splits oddly. This guide works in the order a good stylist thinks: first the length map, so you know where the fringe should land on your face; then your texture, because straight, wavy, curly, fine and thick hair all behave differently; then the pairings, variations and colours that turn a simple fringe into one of 18 distinct styles.
Why Curtain Bangs Flatter an Oval Face
The centre part echoes the face’s natural symmetry
An oval face is close to symmetrical, with the forehead and jaw in soft balance. A centre-parted fringe follows that same line down the middle of the face, so the whole look feels calm and intentional rather than styled against the face’s shape. The two sides of the curtain mirror each other, sweeping out like a frame around a picture that was already well proportioned.
They spotlight eyes and cheekbones without shortening the face
A straight-across fringe draws a horizontal line that can make a face look shorter and wider. Curtain bangs do the opposite. Because the middle is shorter and the edges are longer, the eye travels diagonally — from the brow, down along the cheekbone, toward the jaw. That diagonal keeps the face’s length, shows off the cheekbones (the widest, most light-catching part of an oval face) and leaves the forehead open, so nothing looks cut off.
The forgiving grow-out: no harsh line, no awkward phase
Curtain bangs are the lowest-regret fringe because there is no blunt edge to grow past your eyes. As they lengthen, the sides simply become face-framing layers, then blend into your regular layers. Most people pass through the whole grow-out without a single hat day. If you have been fringe-shy since a childhood bowl cut, this is the safe way back in.
The Length Map: Where Your Bangs Should Land
Before you save reference photos, decide on a landing spot. Stylists talk about curtain bangs by the facial landmark the ends touch, and each landmark changes the mood of the whole cut. For a deeper look at how stylists match fringe placement to face landmarks, Allure’s stylist guides to curtain bangs and face shapes are a helpful second opinion before your appointment.
Brow level — bold and playful, eyes become the feature
The shortest classic option: the centre of the fringe brushes the brows and the sides sweep to about the outer eye. This length throws all the attention onto your eyes and brows, gives a playful, slightly retro energy and works beautifully if your eyes are your favourite feature. It is also the highest-maintenance landing spot, because even half an inch of growth changes the look, and it can feel heavy on very thick hair.
Cheekbone level — the classic sweet spot for oval faces
This is the length in most saved photos, and for good reason. The ends land right on the cheekbones, so every time you turn your head the fringe brushes the exact point where blush and highlighter sit. On an oval face, cheekbone length balances the forehead and jaw perfectly, pairs with every hair length from a bob to waist-length layers, and grows into jaw length gracefully. If you cannot decide, decide this.
Jaw level — soft, romantic, and the safest first cut
Long curtain bangs that end around the jaw are barely a fringe at all — they are face framing with a centre part. This is the safest first cut if you are nervous, because it changes your look the least, needs the least daily styling, and disappears completely into long layers if you change your mind. It flatters oval faces by softening the sides of the jaw, and it is the best starting point for thick or curly hair, where shorter lengths can spring up unpredictably.
How shrinkage changes the map on wavy and curly hair
The map above describes where bangs land when dry and styled — and that detail matters. Wavy hair can shrink half an inch as it dries; curly hair can shrink one to three inches, depending on how tight the curl is. So a fringe cut to cheekbone length on wet curly hair may bounce up to brow level by the time it dries. The rule stylists follow: on wavy and curly hair, cut one to two inches longer than the goal, let it dry fully, and only then judge whether it needs to go shorter.
Curtain Bangs by Hair Texture
The same length map behaves five different ways on five different textures. Find yours below — styles 1 to 5 are built texture-first, because getting the texture right matters more than the exact length.
Straight hair: classic soft curtains with blended edges
1. Classic Soft Curtains on Straight Hair. Straight hair shows every line of a cut, so the secret here is blending: the edges of the fringe are point-cut or softly razored so there is no visible step between bang and layer. Straight curtains fall cleanly, part naturally in the centre and show the diagonal sweep at its clearest. Your one job is volume at the root — a quick round-brush lift (see the styling steps below), because straight hair can let the fringe lie flat against the forehead by midday.
Wavy hair: beachy curtains that style themselves
2. Beachy Self-Styling Wavy Curtains. Wavy hair is the texture curtain bangs were born for. The natural bend does the sweeping for you, so the fringe falls into soft, touchable curtains with almost no heat styling — scrunch a little leave-in cream into the front section, air-dry, and separate the waves with your fingers. Waves look best cut at cheekbone or jaw length, where the bend has room to form; brow-length waves can flip outward in ways you did not order.
Curly hair: dry-cut, curl-by-curl curtains
3. Dry-Cut Curly Curtains. Curly curtain bangs are joyful and completely possible — with one non-negotiable rule: they must be cut dry, in their natural curl pattern, curl by curl. A fringe cut wet will shrink and surprise you. Each curl is placed where it will actually live, usually landing between brow and cheekbone when dry, and the shape is checked from every angle before the scissors stop. If your stylist reaches for the spray bottle to soak your fringe flat before cutting, that is your cue to find a curl specialist. For more on working with your natural pattern, explore curly hairstyles shaped around natural texture — the same dry-shaping logic applies there.

Fine or thin hair: wispy curtains from a small front section
4. Wispy Curtains for Fine Hair. Fine hair cannot spare a deep, thick fringe section — taking too much hair from the crown makes the rest look thinner. The wispy version starts from a small, shallow triangle at the front hairline, so the fringe is light, see-through and soft rather than solid. Kept at cheekbone length, wispy curtain bangs add the frame without the weight, and they are the easiest version to style: thirty seconds with a dryer on the front section and you are done. Avoid heavy oils and creams anywhere near them; fine fringe shows product instantly.

Thick hair: full curtains with thinned, moving ends
5. Full Curtains with Thinned Ends for Thick Hair. Thick hair gives you the lush, seventies-style curtain in full — but only if the ends are thinned and texturised. Without that, a thick fringe can sit like a shelf and push outward at the sides. Ask your stylist to remove weight from the last two inches of the fringe and the pieces beside it, so the curtain swings instead of sitting. The reward is the most dramatic version of the style: full in the middle, feathered at the edges, and surprisingly easy to grow out.
Curtain Bangs Paired With Your Hair Length
Once texture is settled, the pairing with your existing length decides the personality of the cut. Styles 6 to 10 keep the same fringe and change everything around it.
With long layers — the fringe melts into face-framing pieces
6. Curtain Bangs with Long Layers. The most requested pairing, and the most forgiving. The longer edges of the fringe continue straight into the shortest layer of your haircut, so there is no visible join — just one long, flowing line from brow to ends. It suits oval faces especially well in its long form: jaw-level curtains plus layers give you the full face-framing effect with almost no daily effort, and if you ever tire of the fringe, nothing needs to be fixed. It simply becomes your layers.

With a lob — the office-to-weekend pairing
7. Curtain Bangs with a Lob. A long bob ending between jaw and collarbone, plus cheekbone curtains, is the pairing that goes everywhere: polished enough for meetings, loose enough for weekends. The fringe keeps the lob from looking severe, and the blunt ends of the lob give the soft fringe a nice contrast. If your workplace leans formal, browse office-ready hairstyles that pair with a soft fringe for ways to pin or tuck the curtain on formal days.
With a chin-length bob — softness around a structured cut
8. Curtain Bangs with a Chin-Length Bob. A bob on an oval face is clean and striking, but it can look a little strict. Short-to-cheekbone curtains soften the outline, add movement around the eyes and stop the bob reading as one solid shape. This pairing loves a slight bend through the ends, styled in the same direction as the fringe flick, so the whole cut moves as one piece.

With a shag — curtains disappear into choppy layers on purpose
9. Curtain Bangs Melted into a Shag. In a shag, the fringe is not a separate feature at all: the curtain is cut choppy and piecey so it dissolves into the layers around it. This is the lowest-styling version of all — texture spray, a rough dry, done — and the best option if you want the fringe look without a visible “fringe moment” every morning. If that undone texture is your whole direction, the messy short choppy cuts that use this same fringe take the idea to its shortest lengths.
Tied up: ponytails, buns and updos with the fringe left free
10. Curtain Bangs with a Ponytail or Bun. A fringe earns its keep on tied-up days. With the length pulled back, the curtain becomes the style: it softens a high ponytail, makes a plain bun look deliberate, and frames the face in photos where slicked-back hair can look harsh. For the prettiest result, style the fringe first, then tie the hair up, and pull the two front pieces forward before you tighten anything. A little bend in the fringe plus a smooth ponytail is a complete evening look in under five minutes.

Shape Variations Worth Knowing
Same fringe family, four different silhouettes. Styles 11 to 14 are the variations to name when you and your stylist are fine-tuning.
Bottleneck bangs — narrow at the centre, wider at the cheeks
11. Bottleneck Bangs. Named after the shape of a bottle neck, this variation is cut narrow and short right at the centre part, then widens quickly as it sweeps toward the cheeks. The effect is a fringe that reads modern and slightly edgy up close, but soft from a distance. On an oval face it is a great middle path: more presence than wispy curtains, less commitment than a full brow-level fringe, and it grows into classic cheekbone curtains without any reshaping.

Feathered curtains with flicked, retro ends
12. Feathered Curtains with Flicked Retro Ends. The seventies original: the fringe is layered so the ends flip outward, away from the face, in a soft wing on each side. It needs the round-brush flick from the styling routine below, and in return it delivers the most glamorous version of the curtain — all movement and cheekbone emphasis. Big, bouncy hair and oval faces are natural partners for this one, because the face shape can carry the extra width at the sides.
Side-swept curtains for anyone avoiding a strict centre part
13. Side-Swept Curtains. If a centre part fights your natural growth pattern — a strong cowlick, for instance — the curtain can simply be cut to sweep from a soft side part instead. One side falls longer and more dramatically, the other tucks shorter toward the temple. It keeps everything people love about curtain bangs (the diagonal framing, the gentle grow-out) while working with your hairline instead of against it. Alternating the side every few days also buys you root lift for free.
Short curtains above the brow — the confident outlier
14. Short Curtains Above the Brow. The boldest option: the centre of the fringe sits above the eyebrows, opening the whole upper face. It is playful, a little editorial, and it makes brows and eye makeup the entire feature. Reserve it for straighter textures (curl shrinkage can turn “above the brow” into a surprise), and know it asks for trims every three to four weeks to hold its line. On a balanced oval face, though, few fringes look more deliberate.
Colour That Makes Curtain Bangs Glow
A fringe lives in the most-seen zone of your hair, so colour placed there works harder than colour anywhere else. Styles 15 to 18 are really colour stories told through the curtain. For the shade side of the conversation, the chocolate brown shades that add gloss to a fringe are a useful companion read before a colour appointment.
Face-framing balayage pieces that lighten the fringe zone
15. Balayage Face-Framing Curtains. Two or four hand-painted pieces, placed exactly where the curtain falls, lighten the fringe zone by one or two shades and make the sweep look sunlit even in winter. Because the pieces are few and placed high, regrowth is soft and appointments can stretch to three or four months. This is the single most flattering colour upgrade for curtain bangs at any length, and it works on every base colour — it just reads as light where your face needs it most.

Blonde dimension — golden, honey and champagne around the face
16. Golden Honey Blonde Curtains. On blonde hair, the fringe is where dimension shows first. Weaving golden or honey tones through the curtain, with paler champagne pieces at the very front edge, stops blonde hair from looking like one flat sheet and gives the face a warm halo. Ask for the brightest pieces to sit on the shortest part of the fringe, so the centre of your face catches the light when the curtains open.
Deep brunette gloss — espresso and chocolate shine
17. Espresso-Gloss Brunette Curtains. Dark hair sells curtain bangs through shine rather than lightness. A deep espresso or chocolate gloss makes the fringe move like liquid, and the diagonal sweep shows a ribbon of light every time you turn your head. It is also the kindest colour option here: a gloss or demi-permanent adds no damage, fades without a line, and can be refreshed in the time a blow-dry takes.
Copper and auburn — warmth that brightens the whole face (and fades fastest: a care note)
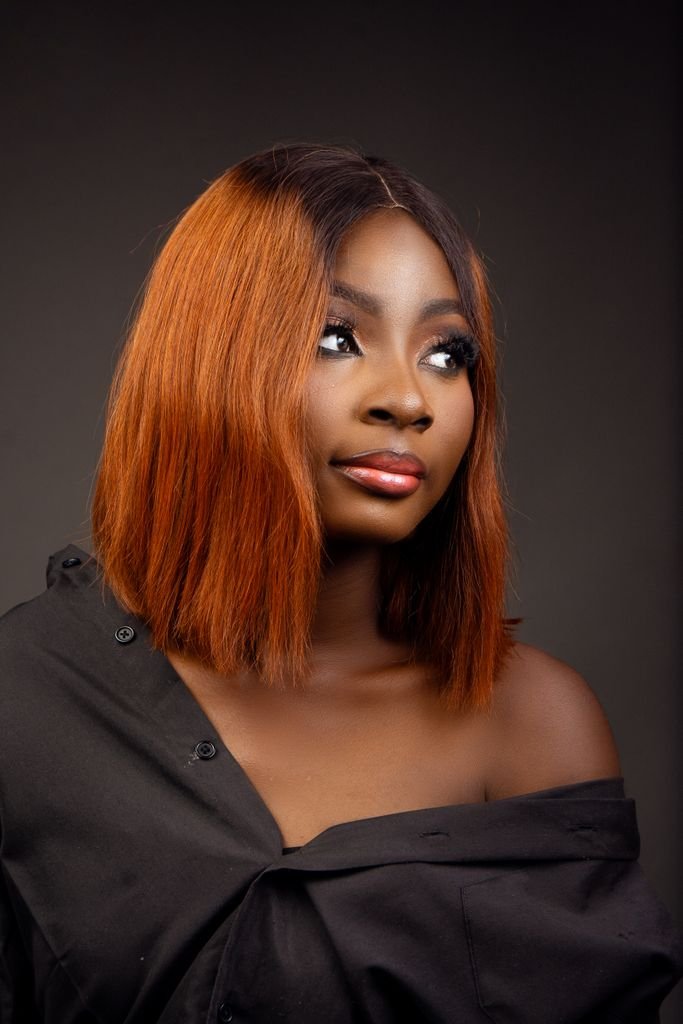
18. Copper Curtains. Copper and auburn curtains are pure warmth: the reddish tones sit right beside your cheeks, so your whole face looks brighter and your eyes — especially green, hazel and blue ones — look more intense. One honest warning: red pigments fade faster than any other colour family. Wash the fringe with cool water, keep heat styling moderate, and use a colour-depositing conditioner between appointments if you want the fire to last.
How to Style Curtain Bangs at Home, Step by Step
Great curtain bangs are made in the salon, but they are kept at the bathroom mirror. The whole routine takes about two minutes once it is a habit, and it follows the same six steps in the same order every time:
- Wet the front section and comb it forward. Curtain bangs only need the front section reset, not a full wash. Wet the fringe at the sink or with a spray bottle, then comb it straight down over your forehead so every hair starts from the same place.
- Blow-dry the fringe down and forward first. Point the dryer downward, from above, and dry the fringe flat against your forehead. This feels wrong — you are drying it into a straight fringe — but it erases cowlicks and sets the roots in the direction the curtain needs.
- Round-brush each side away from the face. Take a medium round brush, place it under one side of the fringe, and roll it up and away from your face as you dry: up, out, and back. Repeat on the other side. The two sides should mirror each other, opening like curtains.
- Twist the ends outward for the soft flick. With the brush or your fingers, give the very ends a small outward twist as they cool. That flick is the signature of the style — it is what makes the ends sweep along the cheekbones instead of hanging straight.
- Cool-set the shape before you touch it. Give both sides a blast of the dryer’s cool shot, or simply leave the fringe alone for sixty seconds while you do your makeup. Warm hair reshapes under its own weight; cooled hair holds. Touching it early is the main reason home styling “doesn’t last.”
- Finish with a light texturiser, warmed between your fingers. Rub a pea-sized amount of light texturising cream or a whisper of dry shampoo between your fingers and pinch it through the ends only. Keep finishers off the roots — product at the root is what makes a fringe separate and look stringy by afternoon.
Wet the front section and comb it forward.
Curtain bangs only need the front section reset, not a full wash. Wet the fringe at the sink or with a spray bottle, then comb it straight down over your forehead so every hair starts from the same place.
Blow-dry the fringe down and forward first.
Point the dryer downward, from above, and dry the fringe flat against your forehead. This feels wrong — you are drying it into a straight fringe — but it erases cowlicks and sets the roots in the direction the curtain needs.
Round-brush each side away from the face.
Take a medium round brush, place it under one side of the fringe, and roll it up and away from your face as you dry: up, out, and back. Repeat on the other side. The two sides should mirror each other, opening like curtains.
Twist the ends outward for the soft flick.
With the brush or your fingers, give the very ends a small outward twist as they cool. That flick is the signature of the style — it is what makes the ends sweep along the cheekbones instead of hanging straight.
Cool-set the shape before you touch it.
Give both sides a blast of the dryer’s cool shot, or simply leave the fringe alone for sixty seconds while you do your makeup. Warm hair reshapes under its own weight; cooled hair holds. Touching it early is the main reason home styling “doesn’t last”.
Finish with a light texturiser, warmed between your fingers.
Rub a pea-sized amount of light texturising cream or a whisper of dry shampoo between your fingers and pinch it through the ends only. Keep finishers off the roots — product at the root is what makes a fringe separate and look stringy by afternoon.
Between full washes, the sink-wash trick keeps everything fresh: tie the rest of your hair back, wash just the fringe with a drop of shampoo at the sink, and run the same six steps. Two minutes, and the whole hairstyle looks freshly done.

Mistakes That Ruin Curtain Bangs
Most curtain-bang regrets come from the same short list. Cutting wet and too short is the classic: hair stretches when wet and springs up as it dries, so a fringe cut to the cheekbone dripping wet can land an inch higher by lunch. Heavy oils that separate the fringe come next — rich serums and oils belong on your lengths, never on the bangs, where they split the curtain into strings. Skipping the 4–6-week trim lets the sides grow past the jaw and swallow the whole effect; a fringe trim is quick and often cheap between full cuts. And finally, copying a style cut for a different texture — ordering the straight-hair photo on curly hair (or the reverse) without adjusting length for shrinkage. Bring the photo, by all means, but ask your stylist the only question that matters: “Where will this land on my hair, dry?”
FAQs About Curtain Bangs for Oval Faces
Do curtain bangs suit oval faces?
Yes, they are one of the easiest fringes for this face shape. An oval face is balanced, so the fringe does not need to correct anything; it simply frames the eyes and cheekbones, and all three lengths — brow, cheekbone and jaw — can work.
What is the best length for curtain bangs on an oval face?
Cheekbone length is the classic sweet spot, because the ends land exactly where they highlight your features. If you are nervous, start at jaw length: it blends into layers like face framing and can be shortened at the next trim.
Are curtain bangs high maintenance?
No. They need about two minutes of heat styling on wash days, a fringe-only sink wash between washes if your skin is oily, and a short trim every four to six weeks. Their soft grow-out is exactly why people choose them over a straight fringe.
Can curly hair wear curtain bangs?
Yes, as long as they are cut dry and curl by curl. Curls shrink as they dry, so the fringe should be cut one to two inches longer than the finished length, and styled by smoothing and twisting rather than brushing out.
How long do curtain bangs take to grow out?
Hair grows about half an inch a month, so brow-length curtains blend into face-framing layers within three to four months. Cheekbone and jaw lengths merge into long layers even sooner, with no awkward in-between stage.
If you are growing a fringe into a shorter cut instead, the short hairstyles that keep a soft fringe after 50 show how gracefully the shape survives the transition.
Conclusion
Curtain bangs ask an oval face to do nothing except what it already does well: stay balanced while the fringe does the framing. So make the decision in the safe order — pick your landmark from the length map, respect your texture, then choose your style from the 18 above. And remember the stylist’s golden rule for first-timers: start long, at the cheekbone or jaw. Hair can always be shortened at the next trim, and most people who start long never feel the need.